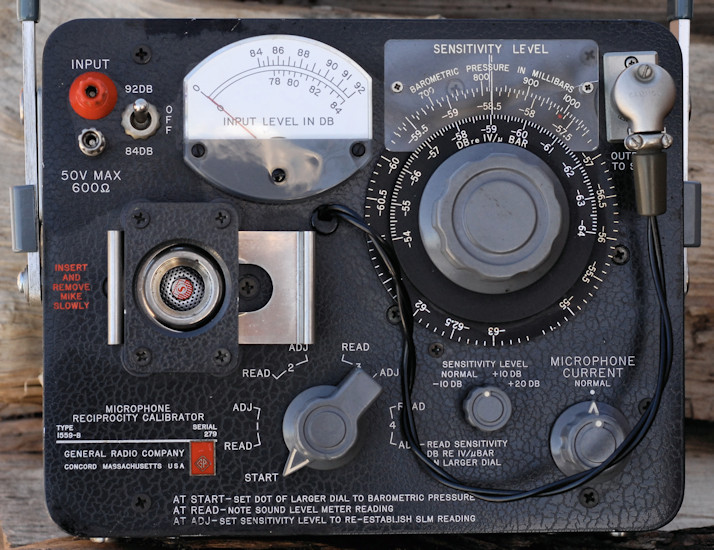

The GR 1559-B is used to measure the sensitivity of microphones and calibrate sound level measuring systems. It uses the reciprocity technique, which, on the surface, appears to measure sensitivity completely out of thin air. That's not entirely true, as the measurement cavity volume is needed, along with some known electrical components and a carefully made logarithmic potentiometer. The technique is sufficiently reliable that it's considered a primary method.
Reciprocity calibration is well described by Wikipedia and the equations are also laid out in the manual for those inclined. In a nutshell, you place several microphones in a small cavity such that they all see the same sound pressure level. One of the microphones has to capable of being both a source and receiver. In the case of the 1559-B, the cavity is a piezoelectric tube (PZT, which stands for lead-zirconium-titanate) which can be excited to generate sound in the cavity. In one end of the cavity is a permanently mounted ceramic mic, the same cartridge found in the 1560-P series. You can see it with the red "S" in the photo above. The DUT (device under test) is inserted in the other end of the cavity. By alternately exciting and measuring the microphones, and applying the necessary equations, the sensitivity of all the mics can be determined. Done manually, the process is a bit of a pain, subject to error, and more of a laboratory exercise than a useful daily method. By putting the necessary switches and measurement capability in one box, the measurement can be made in a couple minutes or less.
Once you have a calibrated microphone using the 1559 or have calibrated the 1559 itself, it can serve as a known source for calibrating other meters and sound level systems. In the photo above, the microphone cable is plugged into the output connector. This is purely for storage so the connector doesn't do damage during transport, but the instrument would never be used in that configuration. There is also an adapter in place for the 0.936" diameter microphones (1559-2220). I thought this was a permanent part of the instrument, but a few drops of alcohol and some careful wiggling worked it free. Thanks to Demian Martin at Product Design Services for pointing this out.
Here are some closeups of the adapter for the standard GR mics (0.936") showing both sides, one of the mics and the instrument port without the adapter.
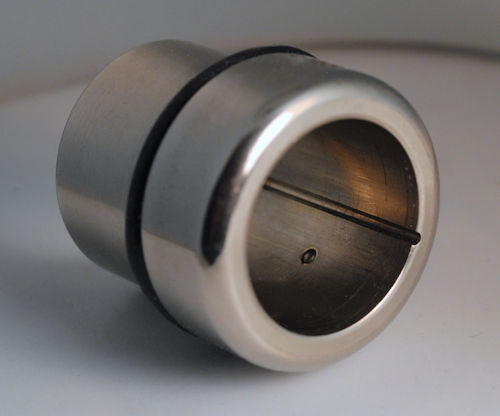
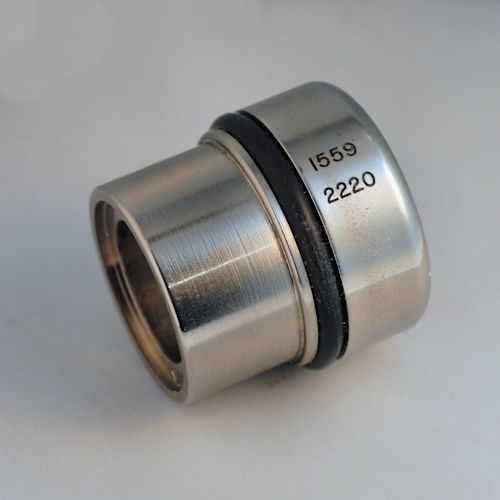
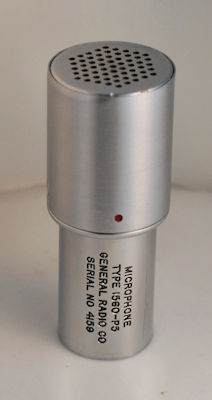

If you look at the instrument port, the first edge to the right of the mic is the far side of the cavity, holding the mic. The next edge is the lip the DUT or adapter sits on. The next step isn't a reference for anything so far as I know. The GR adapter has the o-ring and balls for friction, making for a complicated shape, but a simple tube with a lip on the bottom would probably work fine. For those who might need to machine an adapter, here's a drawing of the 1559-2220. GR1559 2220 Adapter Drawing
The sliding retainer/lock on my unit interfered with the face of the adapter. I don't know the reason for this, but putting some thin washers under the plastic standoffs moved it out enough to solve the problem. The rear shelf of GR microphones doesn't protrude from the adapter, being a few thousandths below the face, so getting positive clamping is impossible. I have to wonder if something is amiss as the manual lists a different adapter for the GR mics, 1559-6080. Earlier mics, 1560-P3 and P4 require no adapter. The units were supposed to ship with an adapter for Western Electric 640AA microphones. Online datasheets show those as "approximately 1", but they were actually 0.936" and I believe the GR adapter is actually an electrical interface for the back end, since the 640AA is a condenser mic and requires a 200 volt bias voltage. I wouldn't go out of my way to acquire one as they have a high collector value and aren't particularly stable with time.
The design was done by Basil A. Bonk and introduced in 1963. There's a write-up in the April/May 1963 General Radio Experimenter for the "A" version and another in December 1964 for the "B" version. There's also a June 20, 1967 patent, #3,327,071, covering the device. The manual also lists a patent, but it's just the 1960 patent for the clamshell case design. The unit appears in my 1970 "U" catalog, but was gone in 1973, so the production life was under ten years.
These seem to be rarer than hen's teeth and I'm guessing not that many were made. Not that many people would need one. I had never seen one in the wild until this showed up on eBay. They're a somewhat risky purchase, as they contain several unobtainium components that would be tough to fabricate or replace. These include PZT tube cavity, an early Shure ceramic microphone cartridge and one of the famous GR potentiometers, probably custom made for just this unit. Though densely packed, there's surprisingly little inside the unit in the way of circuitry. It's entirely passive, relying on an external signal generator and detector.
Back in 1963 engineers used slide rules, which get their result by adding logs. Circular slide rules were well known and what Bonk did was to create an analog computer by mechanizing a circular slide rule to total the results of the measurements. As one turns a switch to set up the individual measurements, the switch also engages or releases a brake on the "answer" dial. It thus turns or does not turn, combining the measurement results at the appropriate time and returning the answer directly in dB.
Though not terribly complicated, the mechanics of the dial can suffer over the years. On my unit the dials were completely seized together. The lubricant needed to be cleaned out and replaced, but the shaft of the assembly also appeared to have grown by a few thousandths of an inch. For rigidity it's a steel shaft covered with a hard plastic. Only after carefully sanding it down to the correct size would the dial turn smoothly. The brake pad that holds the dial also needed to be replaced. It was probably cork, but I replaced it with some silicone rubber having a PSA backing. It's essential that the dials turn together by friction when the brake is off, and that the answer dial remains fixed when the brake is on.
There are manuals available online for both the A and B versions of the instruments. They cover usage very well, but internal calibration not at all. I've reverse engineered what I think is a reasonably good calibration procedure, included in the spreadsheet linked later. As long as the potentiometer is truly logarithmic, and the current sensing capacitor is within tolerance, the unit should be able to give you an accurate microphone sensitivity. With that, the rest of the instrument can be calibrated. The online manual is from 1965 and I'm hoping a later manual will cover calibration. I'd certainly like to hear from someone who has a later manual!
Using the instrument requires that you have some less common support gear. Specifically, you need a signal generator that can output up to 50 VAC and that has a 600 ohm output impedance. One of the GR bridge oscillators like 1210 or 1310/1311 can work, as can the old but capable 1304-B beat frequency oscillator. You'll also need a high impedance detector. This can be a 1551 sound level meter or 1564-A or B Sound and Vibration Analyzer. I've also had good success with an HP 400E millivolt meter. You need to measure and match low millivolt level signals without contamination by noise or hum, which can be unexpectedly difficult. Finally, you'll need a GR ceramic microphone like 1650-P5 or P6. This is really what the unit was designed for, and is necessary for full function, after which it can be used to calibrate other mics and systems.
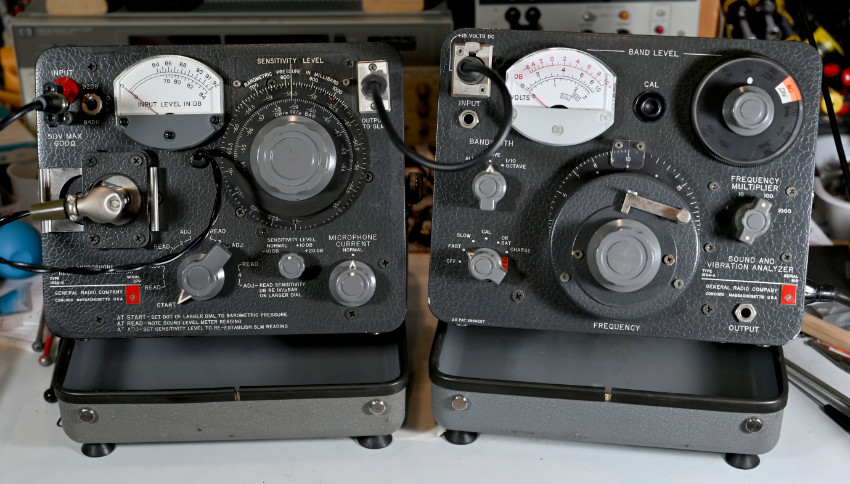
Below is the GR 1559-B and a GR 1564-A being used as a detector. The signal generator is out of sight at the left.
An interesting thing I learned while researching the instrument is that General Radio Corp. microphones were made by Shure. You can see the red S on the front of the internal mic in the upper photos. I don't know how long Shure made the mics for GR or if GR ever brought production in-house. Shure no longer has the information, as they routinely transferred all OEM documents to the customer at the end of production. You can still find the data sheet for the Shure 98A108A ceramic microphone online and I suspect it's at the heart of all the GR microphone designs. A special thanks to Michael Pettersen at Shure for confirming the above.
Using the 1559-B will give you an intimate understanding of barometric pressure, as that's one of the first things you'll set on the dial. Barometric pressures are usually reported normalized to sea level. What you need is the pressure at your specific altitude, the "station pressure". It's easily calculated if you know your altitude, or you can use the nomograph in the manual.
Here's a spreadsheet that converts barometric pressure, covers mechanical and electrical service and shows how the calibration constant is derived- it's not as straightforward as the simple formula in the manual would lead you to believe. GR1559-B Helper Spreadsheet
It's hard to keep links current so I won't add them here, but the following are interesting documents you should search for:
C. Hoffman
last major edit March 28, 2022