Someday I'd love to do a full cleaning and repaint of my 1947 Logan model 211, but I've been too busy making parts on it for the last 15 years or so. I've done a few minor improvements that might be of interest. I think my camera intensifies rust and dirt- the lathe looks far better in person than in these photos!
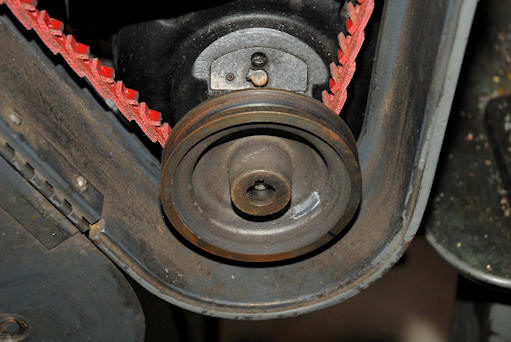
Here you can see the motor pulley and a small adhesive wheel weight to balance it. Basically you run the motor with your fingers lightly resting on the cantilevered iron mounting base. No belt. When you turn off the motor it will coast down through the resonant frequency and you'll easily feel the vibration. A bit of trial and error for mass and position on the wheel weight will eliminate the vibration. Also note the Fenner Power Twist Plus v-belt which reduces vibration to a minimum.
It may seem I'm overly concerned with vibration and getting the lathe to cut with tenth accuracy, but almost everything I make is very small, with threads sometimes exceeding 100 TPI, so the better the lathe performs, the better the parts.
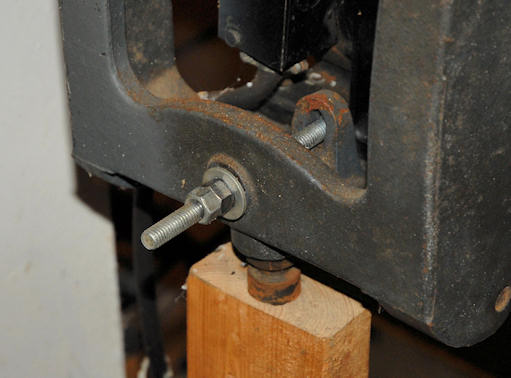
The motor tension adjustment also affects how much vibration is transmitted to the lathe. You need enough tension to avoid slippage, but no more. It will move on its own, so use double nuts. I tried a strong spring here, but that creates a resonance at certain speeds. Best to stick with a fixed adjustment.
The flat belt tension, I find, benefits from adjustment depending on speed, material and depth of cut. In theroy the fit should be the same on any pulley combination, but it's not quite perfect, probably because of the amount of wrap. If the belt slips off a pulley, it's slipping and not tight enough. You don't want it so tight that the cover lifts! It's a lot handier to have a knob than to keep a screwdriver handy for the slotted screw.

Speaking of the flat belt, I use an automotive serpentine belt. This is quieter and transmits more torque than the old leather belt. I don't believe in splicing the belt. It's worth it to pull the spindle from the headstock to install the new belt, plus that's a good opportunity to flush the bearings and regrease them with something decent like Kluber NCA-15 (expensive and probably overkill for the speeds involved) or Chevron SRI #2 (dirt cheap and very good). Ball bearings require grease specifically designed for ball bearings. It will not contain moly or Teflon and it will generally mention ball bearings and machine tool spindles in the data sheet. Unfortunately, anything you can find at the auto parts store is almost certainly a poor choice. Order one of the greases listed above.
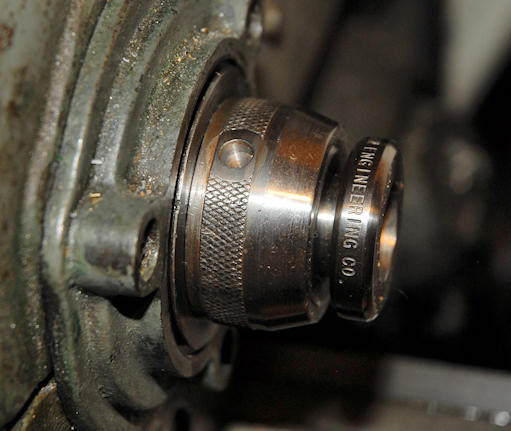
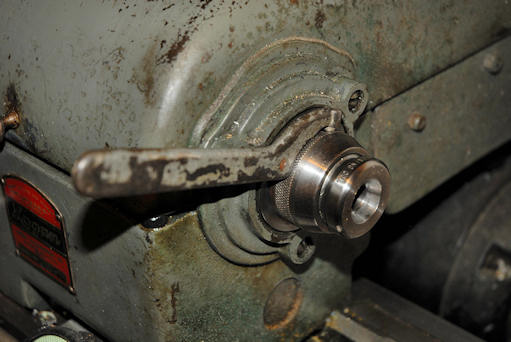
Installing the 3AT collet adapter is easy, but most people don't understand how to get it out without abusing the spindle. That's the purpose of the "thread protector". The hole in mine was nearly destroyed from being removed using a punch and hammer so I pocketed around the hole with a 1/2" end mill. Then I pressed in a plug with the appropriate sized hole. Now it's a simple matter to unscrew the thread protector against the collet adapter, put the proper pin wrench on it, and bop it with the heel of your hand, popping out the collet adapter.
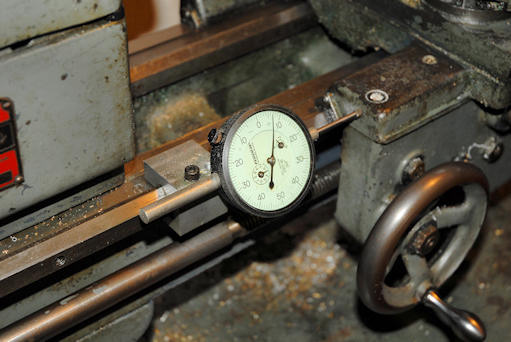
You have to have an indicator holder, but don't make one like this. Because it spends most of its time right next to the headstock, it's awkward to get the hex key in there. A good one wouldn't require a key at all. Still, it's served me well for over a decade.
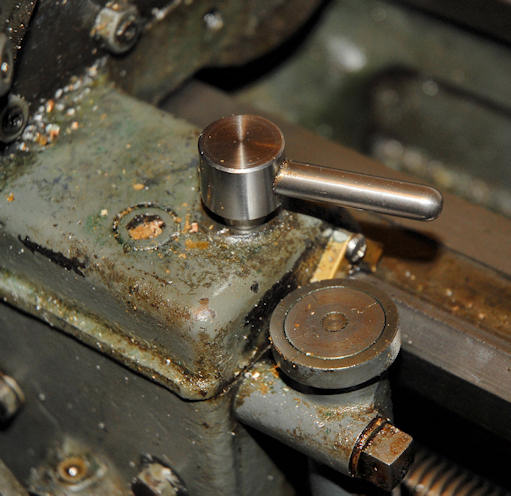
I believe the factory carriage lock was just a square headed bolt. Mine was missing and somebody replaced it with a hex bolt. Neither was as handy as this simple lever, as I use the lock frequently, say whenever facing or parting off. Yes, that's sawdust, Lignum Vitae in fact. I seem to turn parts out of every material known to man, metals, plastics, wood, machinable ceramics, you name it.
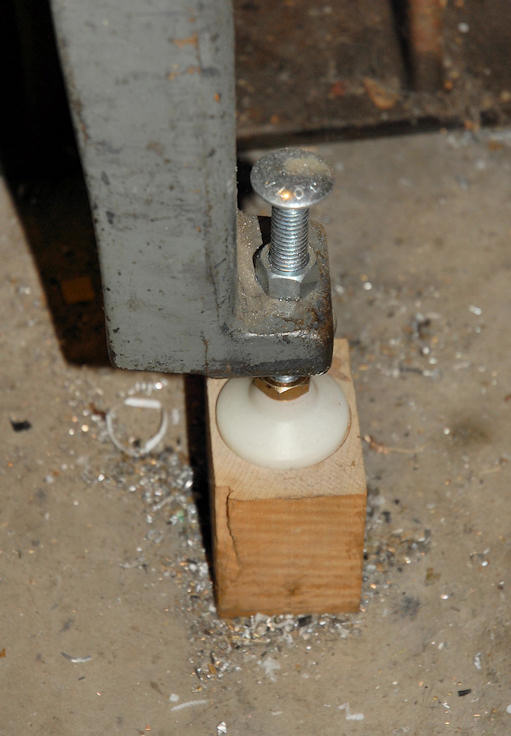
Let's consider leveling. I used to do this with shims under the cast legs, but this was always an annoyance and never seemed to come out right. Here are some Carr-Lane feet, plus some pocketed maple blocks to get the lathe up to a nice height. This avoids back pain when using it. I'm not that tall, but the lathe is 5 inches higher than it would be without the feet and blocks! You should level your lathe carefully and then do a test cut. If the lathe cuts a very small taper, say a couple tenths per inch, you can correct it by twisting the bed ever so slightly. If the taper is larger, say the .002 inches per inch that mine produced, you have to find the cause and correct it. You can't fix it by turning the bed into a pretzel. Though I have no photos of the details, I had to shim the headstock slightly to get perfect results. I believe, though it would be tough to prove using my simple measurement equipment, that the bearing bores in my headstock were simply out of line by a slight amount. Lathe leveling is now very easy with just a wrench.
It's such a small thing, but for goodness sakes put up a convenient shelf to hold tooling and such. Investing a couple hours to improve efficiency will benefit you for years to come. Note that I've made my metric conversion gear set, and a few specials, out of Delrin, white because that's what I had a chunk of. They're easy to make and hold up fine. The stress on the gear train is very low, so they'd probably hold up well even in a production situation.
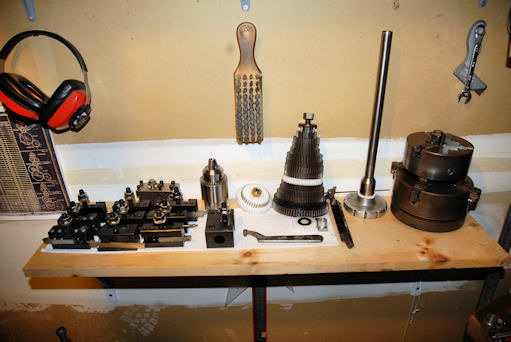
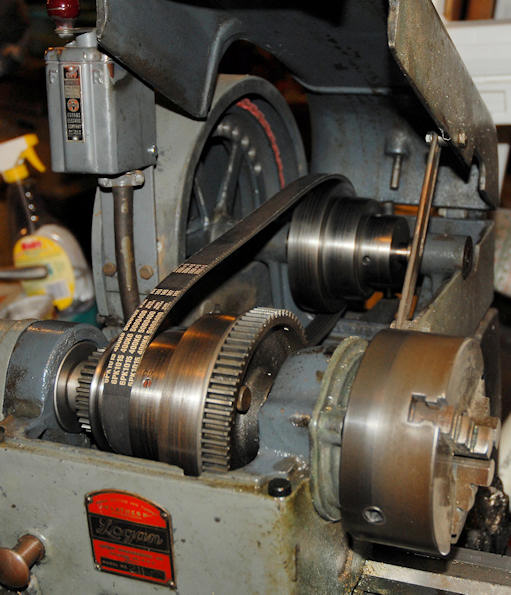
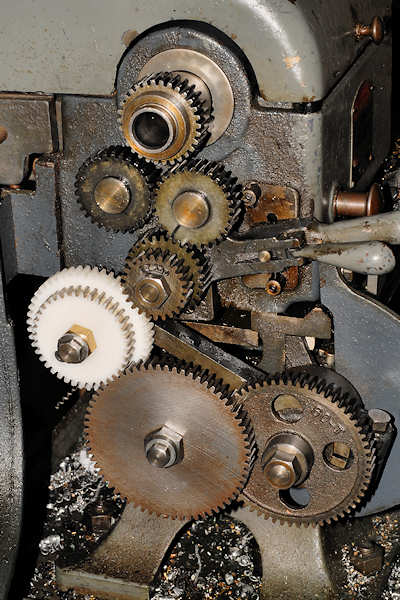
Here we put those gears to good use. I do a lot of metric threading, and it's invariably much finer than 1 mm pitch. This photo shows the setup for cutting 0.5 mm pitch. The stud gear is 24. The 37/47 metric transposing set is the white Delrin pair on the left. The intermediate reducing set is 32/64 in the middle (the 32 is hidden) and the screw gear is 60. The easiest way to look at this is that the 37/47 pair converts the 8 TPI lead screw to an effective 2.5 mm pitch lead screw. 8 TPI = 0.125" pitch or 3.175 mm pitch. (3.175 * 37)/47 = 2.5 mm. Actually, it's 2.49946808, not quite perfect, but so close the error almost never comes into play. If you just pretend the lathe now has a 2.5 mm pitch lead screw, everything else is easy. In this case, 2.5 * 24/64 * 32/60 = 0.5 mm. There are many combinations of gears that will yield the correct answer, at least in this case. You have to check the fit because not all combinations will physically fit, even if the calculations work out correctly. A quick change gearbox doesn't offer much advantage for metric threads and my opinion is that the plain change gear system is more direct and robust, probably resulting in lower cyclic errors, though one is still at the mercy of the lead screw accuracy.
Sometimes the threading chart on the inside of the gear cover has gone missing. If you need one of this vintage, here's a copy of mine you can print out. Open the full image and, if you like it, right click on it to save.

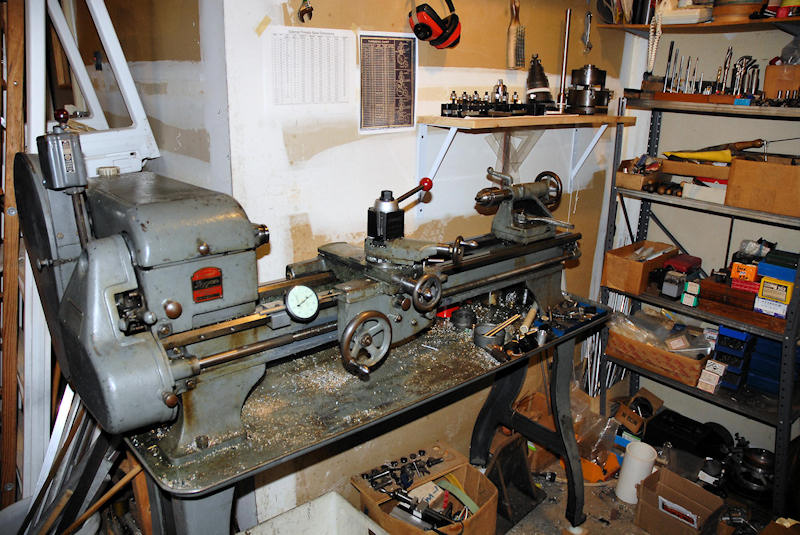
Here's a couple shots of my messy corner of heaven in the shop. The little niche in the garage isn't very big, but it suits the lathe perfectly. Notice that I took a photo of the gear diagram in the lathe and taped it to the wall. Much easier to read. BTW, the wedge type QC toolpost was the best investment I've made in the lathe. No more shims and the rigidity is far better than a lantern or a 4-way. It looks huge in the photo, but it's an AXA/100 and suits the size of the lathe just right. The post is a Phase II, with extra tool holders from CDCO.
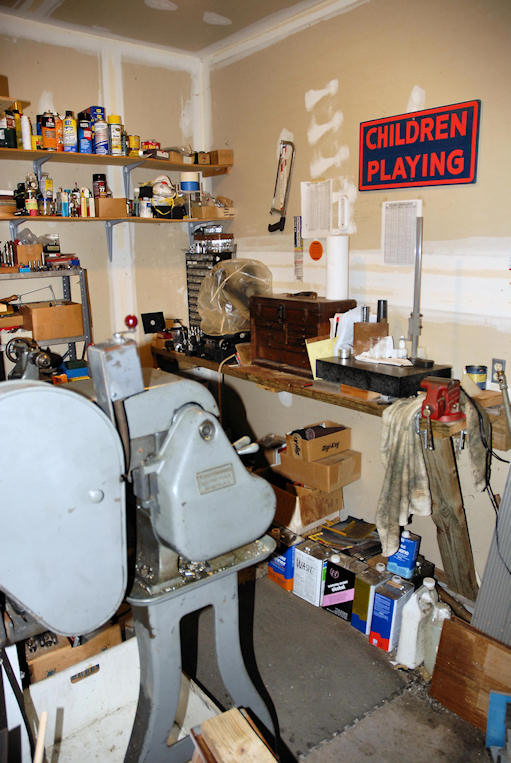
And the other side...
Finally, you want to keep stains and corroded spots off your tools. I don't know why, but mice seem to love clean steel, especially things like grinding vises and 1-2-3 blocks. The more expensive, the better. Death to the mice!

Conrad R. Hoffman